sell website making service

How to remove points earned & redeemed from WooCommerce invoice

For WooCommerce eCommerce website, I wanted to remove or delete, a better word is hide Message to display Earned Points” and “Message to Redeemed Points” from Invoice that I am printing for Orders. I wrote my experience below in steps that will help you to hide it from invoice if you don’t want to show it in your printed invoice.

SUMO Reward Points – WooCommerce Reward System

We are using SUMO Reward Points – WooCommerce Reward System WordPress plugin for points reward system for our woocommerce website. This helps us give customers points when they buy from our website, and later customers can use those points to redeem discounts for their next order. This is a paid plugin with many options and helps us a lot when returning customers can avail discounts and comes back to buy from us again and again.

PDF Invoices & Packing Slips for WooCommerce


We are using PDF Invoices & Packing Slips for WooCommerce WordPress plugin to generate Invoices to print when delivering the parcel also this invoice is attached to the email that customers receive after placing the order. We are using the free version from the WordPress plugin repository. This is a fantastic plugin that also has options and if you have coding knowledge you can highly customize the Invoice or packaging slip output by adding extra text and images inside Invoice.

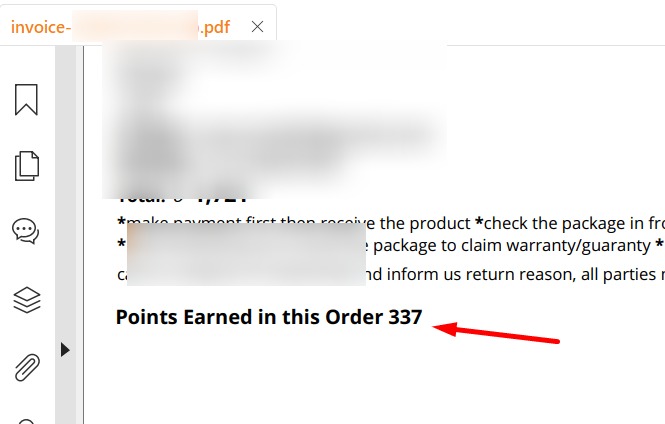
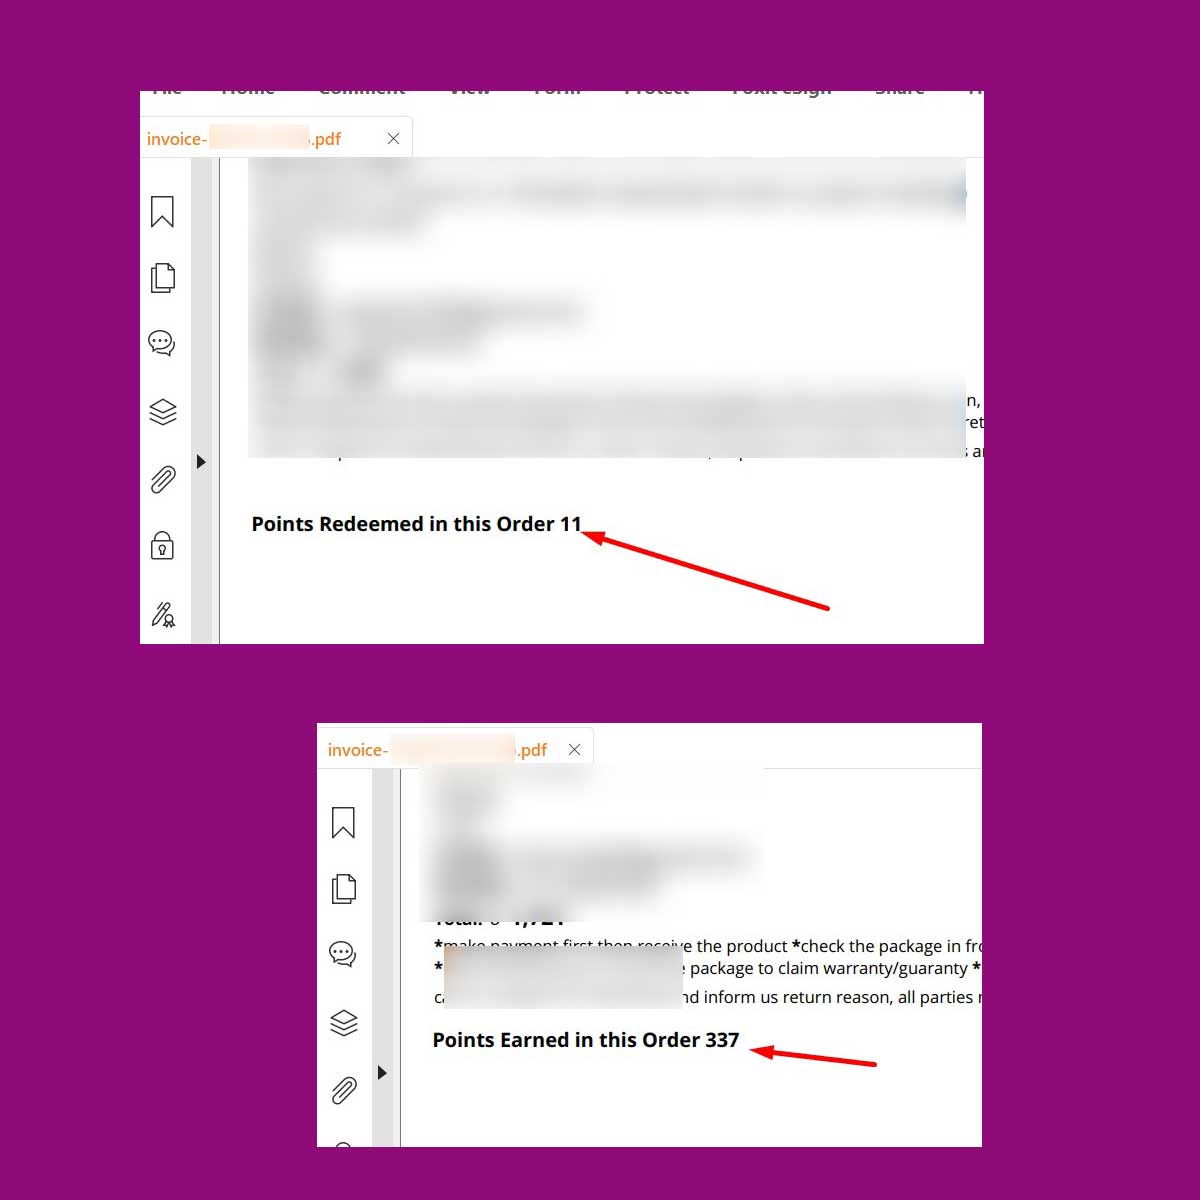
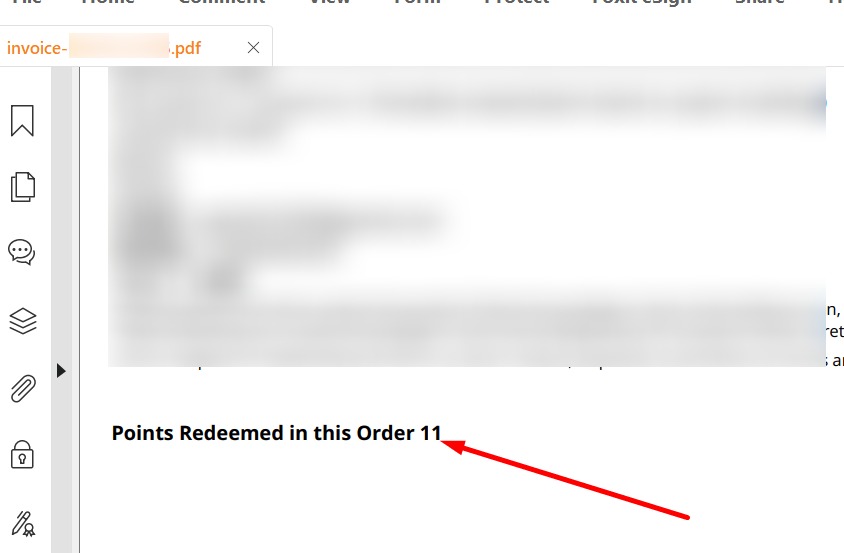
From Invoice pdf
How to remove points earned & redeemed from WooCommerce invoice
Points Redeemed in this Order
How to remove points earned & redeemed from WooCommerce invoice
Points Earned in this Order

I wanted to hide those from my printed invoice because these lines doesn’t matter, as the points redeemed discounts are already shown on the middle part of the Invoice and I need to cut extra piece of paper every time for packaging, therefore, printing it twice on same page was a waste.

SUMO Reward Points – WooCommerce Reward System – plugin options with HTML

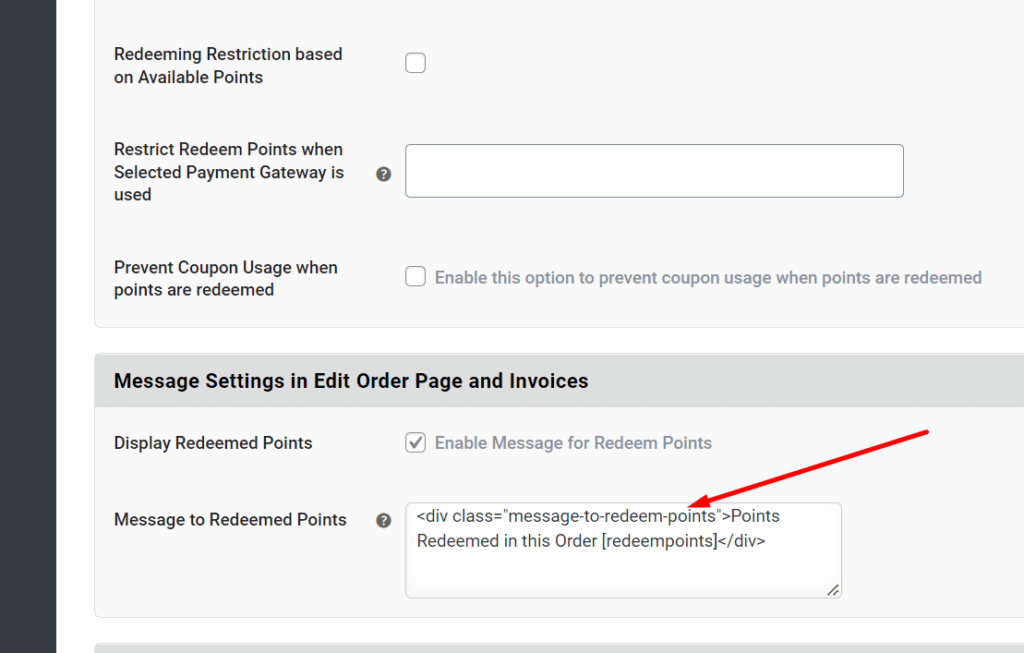
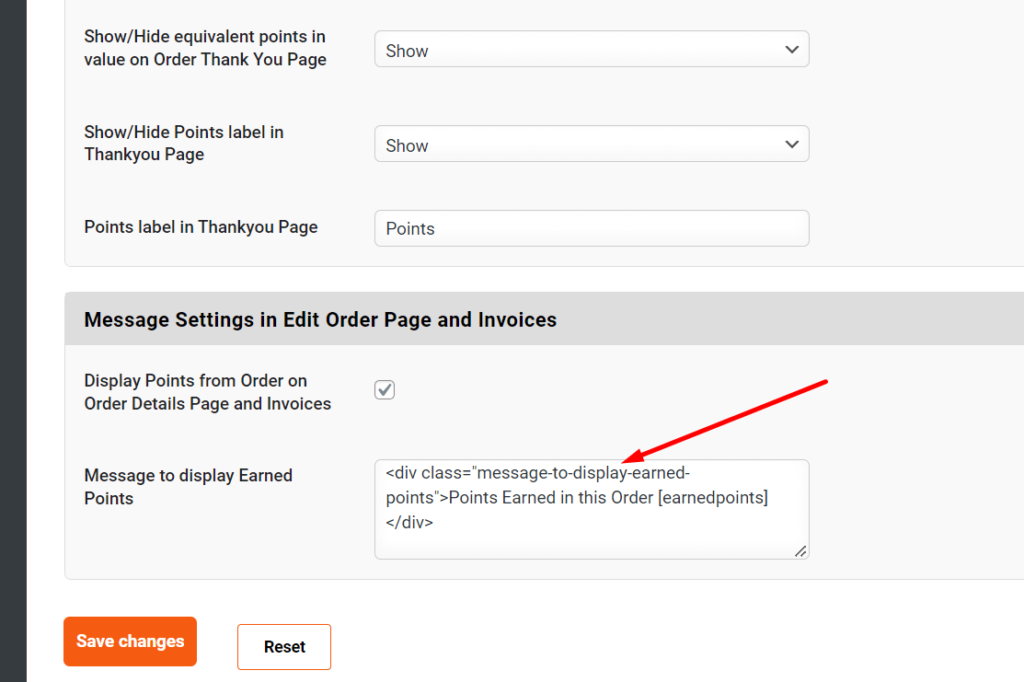
While searching for “Message to display Earned Points” and “Message to Redeemed Points” I found it inside SUMO plugin options like the below screenshots
How to remove points earned & redeemed from WooCommerce invoice
Message to Redeemed Points
How to remove points earned & redeemed from WooCommerce invoice
Message to display Earned Points

You will find these option fields on Sumo plugin modules, please go through the options and type in the keyboard “Ctrl+F” to find the text and jump on it.

From the above 2 screenshots, I used HTML to wrap the message and applied <div class.. to hook the message from invoice and used CSS to display:none; that is hide it from invoice. I used HTML CSS here because if you make this message off by clicking the checkbox this message will also be hidden from Order edit wp-admin page, which we don’t want, rather we want to hide it from Invoice only.
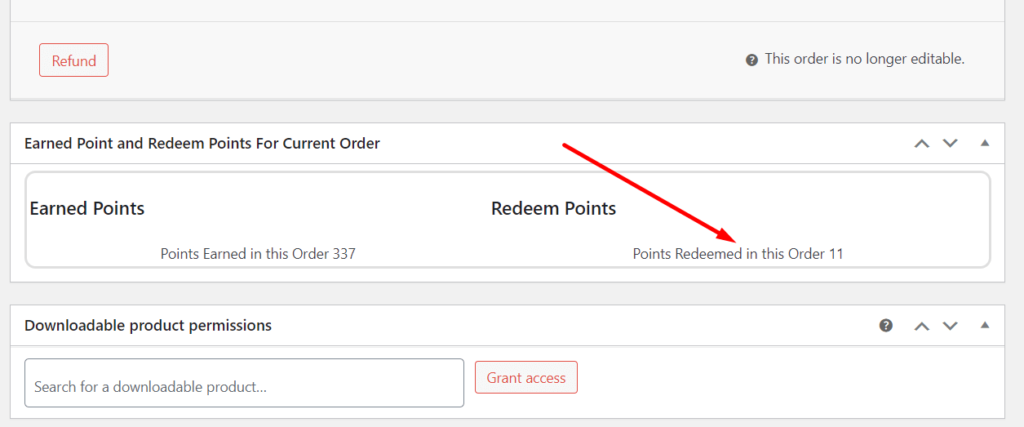
How to remove points earned & redeemed from WooCommerce invoice
Order edit wp-admin page

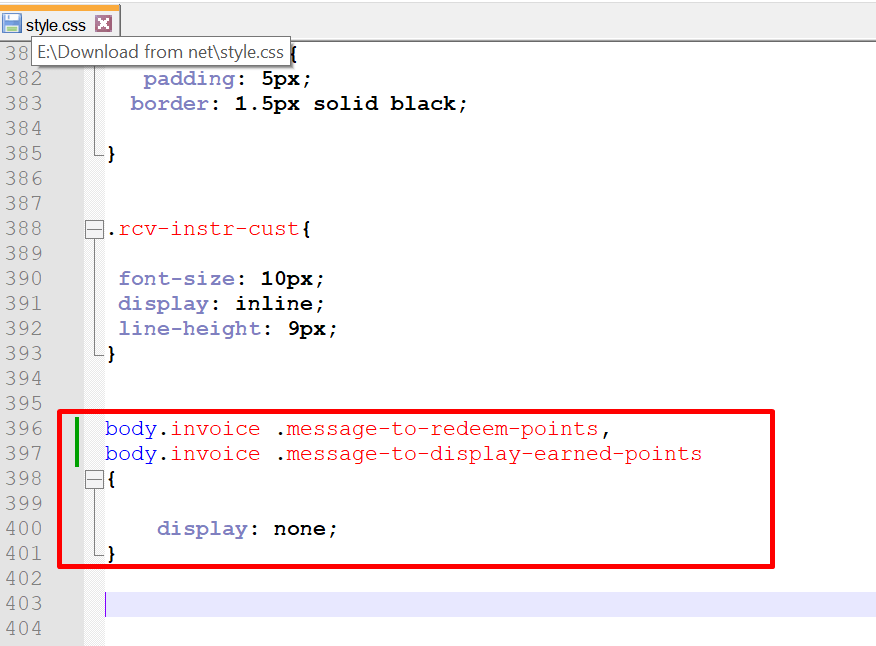
CSS Code

How to remove points earned & redeemed from WooCommerce invoice
CSS code for style.css file

Put your CSS code as per above format marked in red box. Style.css is located under theme folder / woocommerce / invoice folder – these folders are responsible for Invoice customization, these folder structures are documented here.

Checking HTML output

While doing customization you can check the changes live by generating HTML rather than generating pdf every time after making a small code change, by following the below screenshot. So after you are done with the changes you can turn off the checkbox and output PDF as permanent for invoice print.
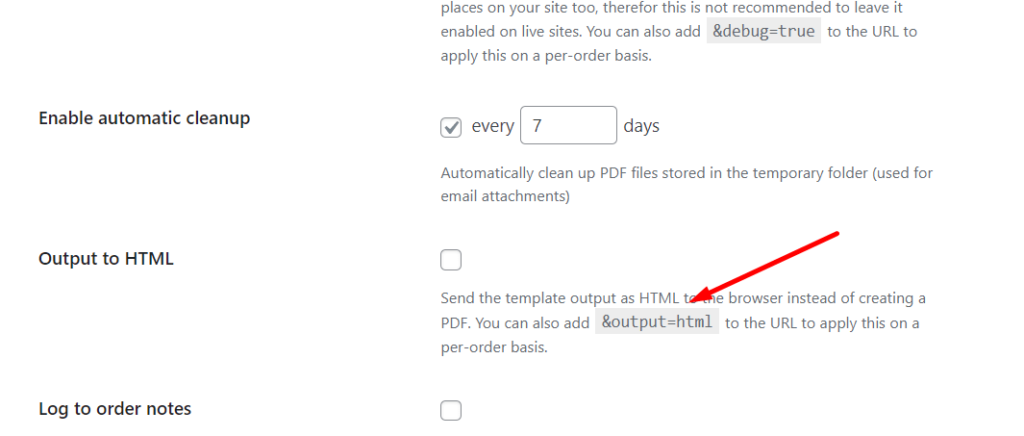
How to remove points earned & redeemed from WooCommerce invoice
HTML output URL

Done

The final invoice will have no messages at the bottom.
How to remove points earned & redeemed from WooCommerce invoice
final invoice pdf

Conclusion

You can experiment with different HTML and CSS to customize the Invoice as per your needs. Need any help send me a message! Please share this tutorial if it really helped.

How to add tag or badge over WooCommerce single product page with CSS

I had a problem where customers could not see or not wanted to see “SOLD OUT” by scrolling down on mobile and instead calling or messaging for product availability or in stock. So I wanted to show the “SOLD OUT” or “STOCK OUT” or sale badge in mobile with CSS so visitors don’t get confused and see stock out when visiting a single product woocommerce page.

Why choose CSS to make or add changes for woocommerce product badge?

I chose CSS rather than Javascript because CSS is easier to apply and does not interfere too much and for me, CSS is easy to apply and less hassle. You can use javascript but too much javascript is not good as per my experience. CSS does not break a website or create critical errors like javascript if applied by mistake.

How to choose which class to take for applying CSS?

How to add tag or badge over WooCommerce single product page with CSS
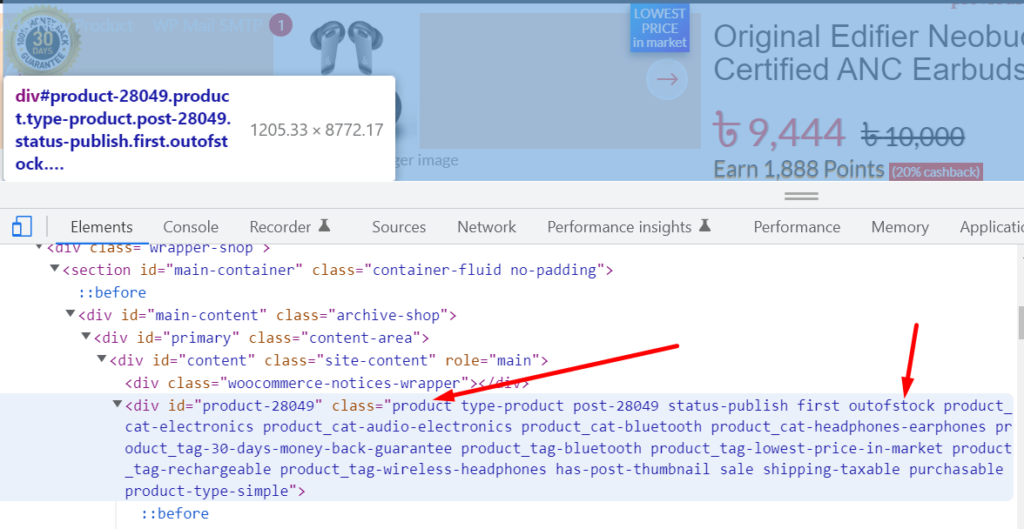
WooCommerce default class
How to add tag or badge over WooCommerce single product page with CSS
CSS :before

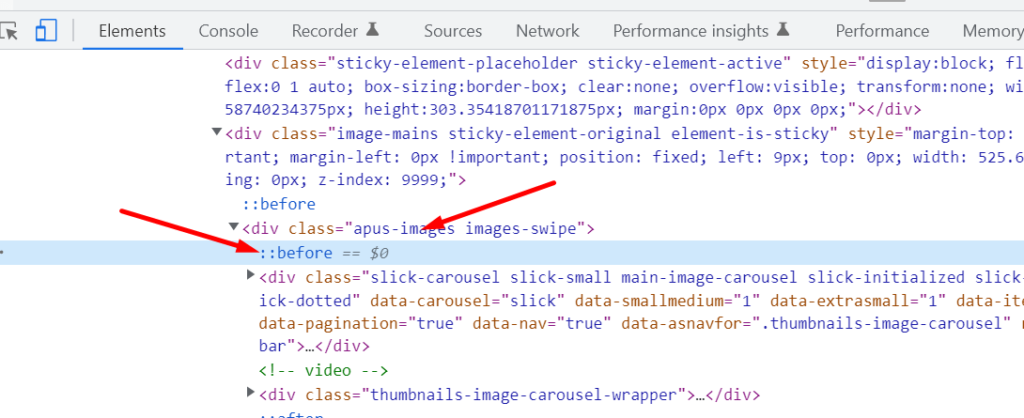
Check my screenshots you need to find out the CSS container where you need to put the “SOLD OUT” text and you can put text using :before or :after with content: " "

.product and .outofstock are default classes by WooCommerce that are auto-generated so I took those as references and applied the CSS. As per your given theme’s structure, your CSS class will have different configurations and child classes so it is better to play around with classes.

If you found the perfect CSS class just copy and paste the code below by replacing your CSS class and you will have a badge with your text, for me it’s SOLD OUT.

.product.outofstock .apus-images:before {
content: "SOLD OUT";
background: red;
position: absolute;
top: 60px;
font-size: 25px;
z-index: 99999;
color: white;
font-weight: 700;
padding: 2px;
}

Conclusion

If CSS doesn’t work for you in critical situations you have to use javascript because javascript is more powerful but complex.

Hope this helps, please share this and link this article if you find it useful.

How to prevent search engines from crawling “add_to_wishlist” link to save server CPU resources.

For quite a long time, I was having problems with my server and have been optimizing since then and have taken different steps to minimize my woocommerce e-commerce website to eat less resources. We all know WordPress is heavy and woocommerce makes it much heavier, therefore my real-life experience will surely help you to maximize your server resources which is good for website loading speed and will improve google crawl budget by preventing search engine bots to not take an excessive amount of resources to crawl the website. Follow to the end to learn how to stop search engines from crawling “add_to_wishlist” link to save server CPU resources.

Why should I restrict or disallow crawling bots of search engines?

links that are taking more resources and making the server slow

Bots use the resources of the server like a real human visitor, therefore if you have limited resources on your server it will use those resources CPU RAM to crawl and go link by link. In our case, we “Disallow” bots to crawl “add_to_wishlist” links on our woocommerce ecommerce website so that our server has enough resources to handle real visitors who are visiting our website and not making the website down or slow.

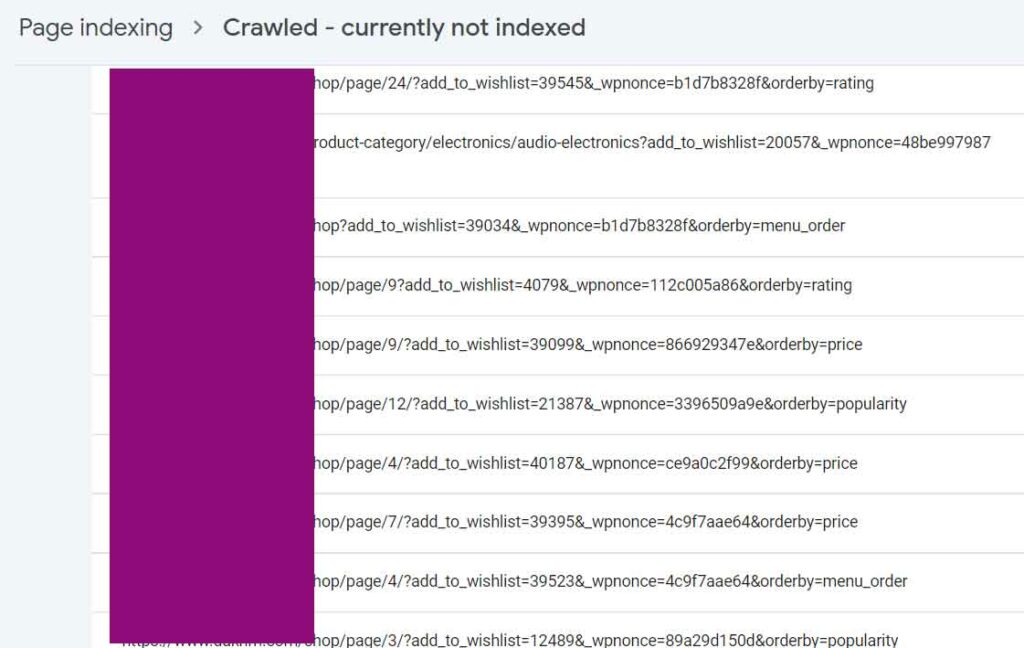
google crawled but did not index such links

Here google bot was crawling “add_to_wishlist” links which are of no use in terms of SEO moreover google is not indexing those links so I decided to “Disallow” bots to crawl links “add_to_wishlist” using robots.txt.

What is robot.txt and how it can help to stop search engines from crawling links?(main step)

This is txt inside root folder of a website, that tells search engines to crawl or not to crawl. To check your robot.txt file from google search console go to this link. Below is an example of what can be inside robot.txt file.

User-agent: *
Disallow: /wp-admin/
Allow: /wp-admin/admin-ajax.php

Sitemap: https://www.yourwebsite.com/sitemap_index.xml

Disallow: /wp-content/uploads/wpo-plugins-tables-list.json

We will be adding Disallow: add_to_wishlist so the new file content will be:

User-agent: *
Disallow: /wp-admin/
Allow: /wp-admin/admin-ajax.php

Sitemap: https://www.dakhm.com/sitemap_index.xml

Disallow: /wp-content/uploads/wpo-plugins-tables-list.json
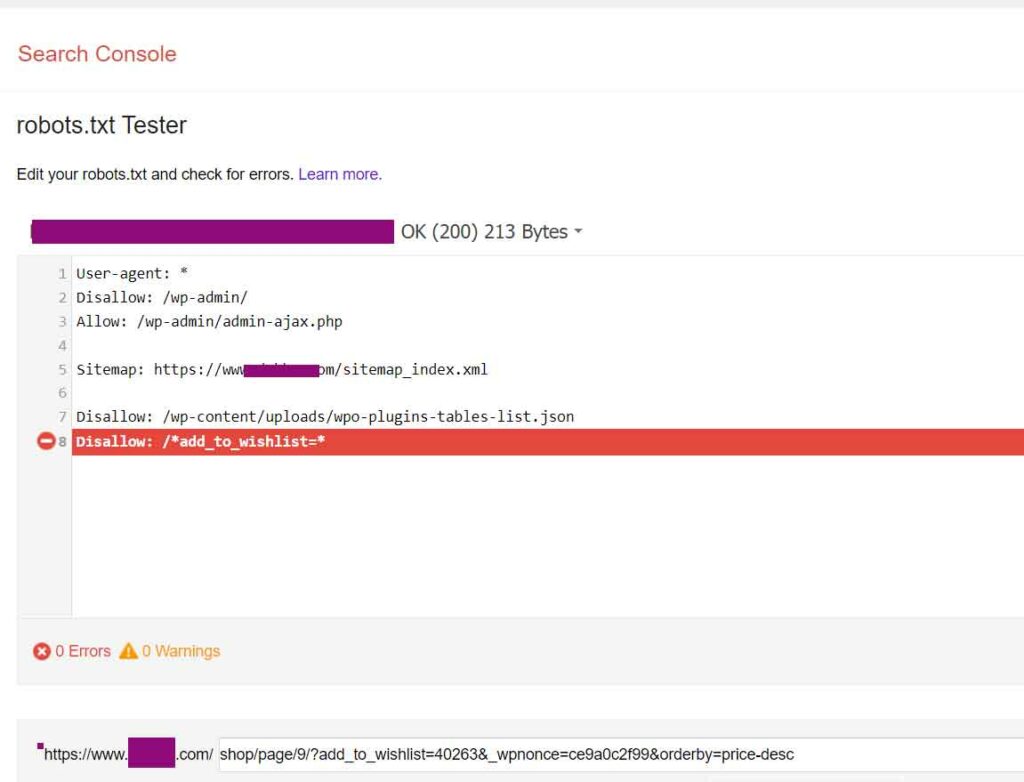
Disallow: /*add_to_wishlist=*

Here we are disallowing google or search engines to crawl that specific type of link. Therefore unnecessary usage of resources from the server will be saved. After adding Disallow you can check it in action like the screenshot below from search console.

How to prevent search engines from crawling
screenshot from search console

To Edit and save robot.txt, you need to download the file and upload it to your website’s root folder.

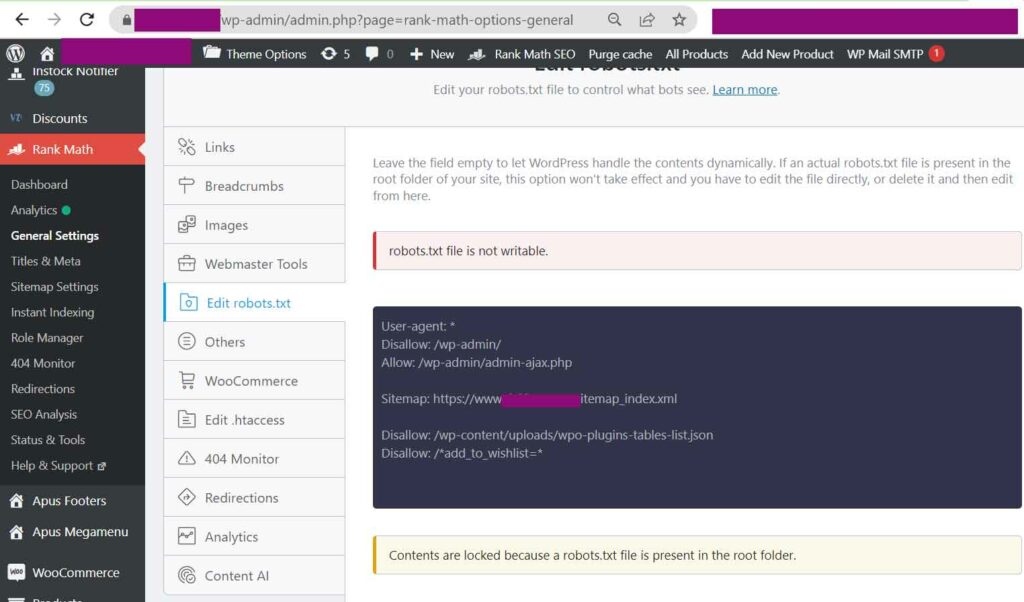
How to check robot.txt file from Rank Math SEO plugin?

screenshot for Rank Math plugin to see robot.txt

Let us continue our article and read below to know more about server usage and find the issue.

How did we find that specific type of link crawled by google bot is causing the CPU usage 100% ?

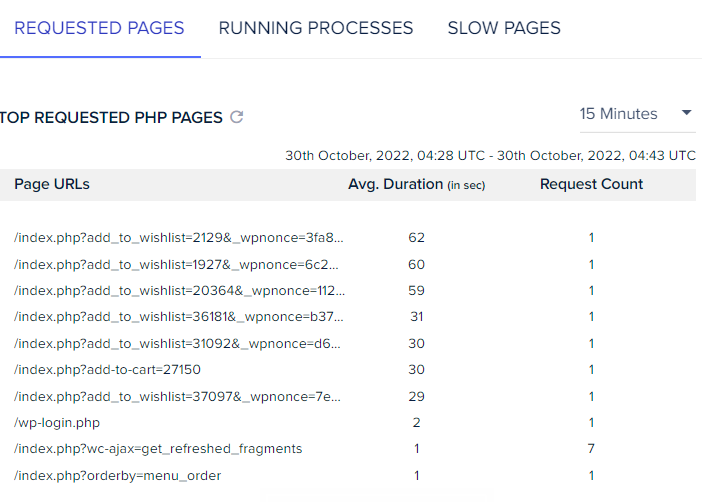
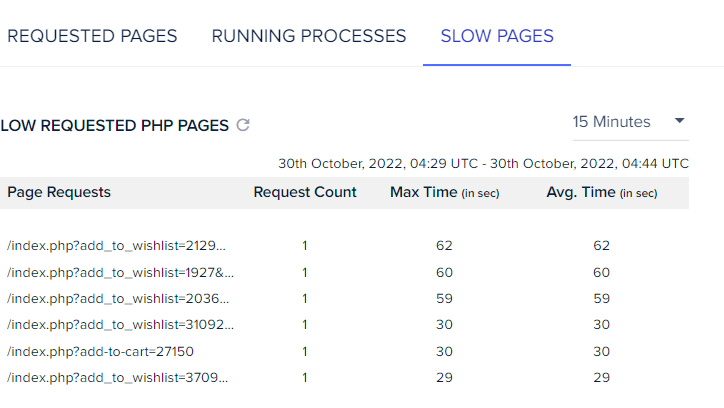
At first, we were seeing extremely slow website and nothing was loading showing database connection errors on certain periods when our visitors were low on the website reported by google analytics. Then we checked our hosting provider Cloudways they are very good as per their customer service and hosting quality and really fast comparatively offer great packages for WordPress. Most of the time we don’t have downtime unless there is a sudden spike in traffic but as we can’t see any visitors on google analytics, we check cloudways slow pages of our website like the screenshot below. Thanks to Cloudways support team and their panel.

How to prevent search engines from crawling

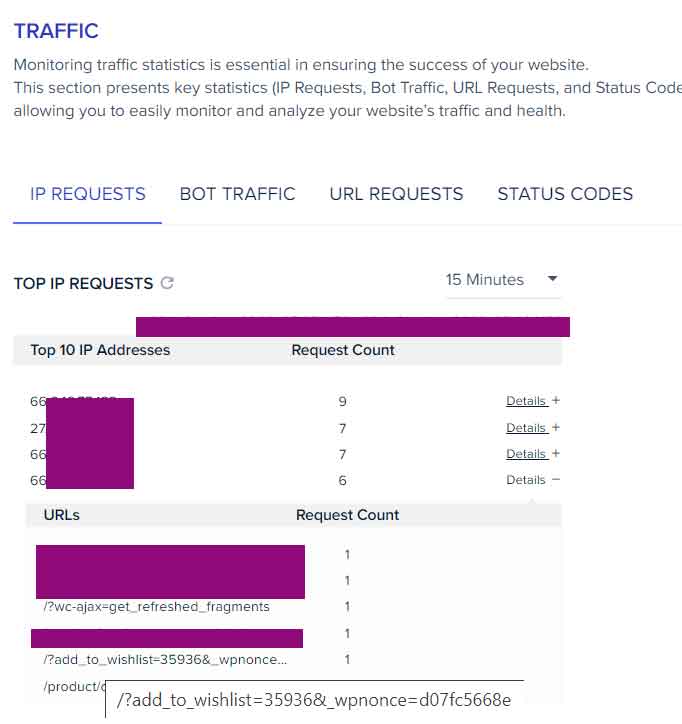
We got a hint that add_to_wishlist link is being accessed at abnormally high rate which is not normal for any organic human visitors and must be of some type of bot. We dig deep and found IP location from google is accessing those links.

Cloudways IP location panel
screenshot from Cloudways IP location panel

With help from IP locator tool we ensured this is a bot and planned to stop any bot from accessing the link of the wishlist.

Conclusion

When in any slow website situation, always first contact hosting support, most of the time they will give you hints or solve your problem but if something arises that looks abnormal like this crawling issue that hosting support can not solve, hire a web developer or contact an expert and in most cases, there can be multiple cases of such server CPU RAM issues. I look forward to solving problems for my clients and myself. This is my hobby to tweak and work with web development and internet. If you are facing situation that is hard to navigate, throw me an email and share this article to help friends and family.

Check Most Recent Posts